While snapping photos or recording quick videos on our phones is common, sometimes a Chromebook’s convenience and stability are a better choice. Chrome OS makes this process easy if you know where to go. Here’s a step-by-step guide to help you capture photos and videos on your Chromebook.
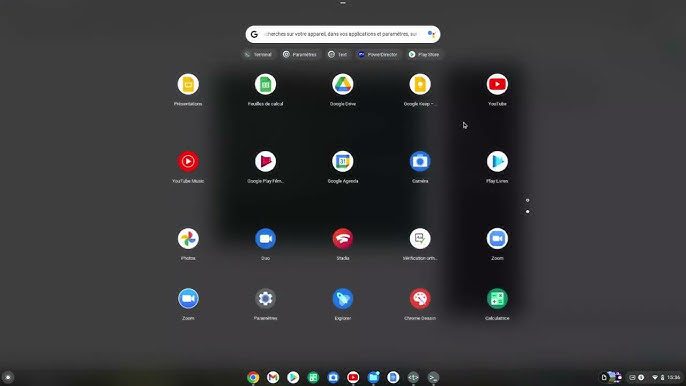
Find the Chrome Launcher
- Open the Launcher:
- On your Chromebook home screen, look at the lower left corner to find the Launcher button.
- Select the upwards-pointing arrow at the top to expand your list of available apps.
Open Your Chromebook Camera
- Access the Camera App:
- Locate the Camera app near the top row of your apps and select it.
- Choose Your Mode:
- Once the Camera app opens, you’ll see options on the right to choose Photo, Video, or a cropped photo option called Square. Select the one that suits your needs.
- Snap or Record:
- Use the large button above these selections to snap a photo or start recording a video.
Adjust Your Settings
- Configure Camera Settings:
- On the left side of the Camera app, you will find various settings options:
- Mirroring: Flips the photo left to right.
- Grid: Adds a grid overlay to ensure your photo is perfectly centered and level.
- Switch Camera: Helps manage an additional attached webcam.
- On the left side of the Camera app, you will find various settings options:
Set a Timer
- Use the Timer:
- On the left side of the Camera app, you’ll see a stopwatch icon to set a countdown timer for your photo or video. Switch between a 3-second or 10-second timer as needed.
Capture Your Photo or Video
- Adjust and Capture:
- Adjust your webcam’s angle and position. The Grid option can help here. When ready, select the large Take Photo button on the right.
- For videos, this button will start recording and show a red dot while live. Press it again to stop recording.
Review Your Work
- Review Your Captures:
- At the bottom-right corner of the Camera app, you will find a round icon displaying a photo you have taken. Select this thumbnail to view your most recent photos or video clips.
- Decide which ones to keep and use the trash can icon in the upper right corner to delete the rest.
By following these steps, you can easily take and manage photos and videos on your Chromebook.


